
A personalized quilted table runner is a practical sewing project that can add color, texture, and personality to your dining table. It also makes a thoughtful handmade gift for birthdays, weddings, holidays, or housewarmings.
You do not need advanced quilting skills to make one. With a few fabric pieces, basic sewing supplies, and a simple design, you can create a runner that matches your home or celebrates a special occasion.
Plan Your Table Runner
Before choosing fabrics, decide how long and wide you want your finished runner to be. The size depends on your table and how you plan to use it.
A typical table runner is:
– 12 to 18 inches wide
– 36 to 72 inches long
For a rectangular dining table, the runner can extend slightly beyond each end. For a round or square table, a shorter runner may work better. You can also make a narrow runner for a sideboard, coffee table, or entryway console.
Measure the table first, then add extra length for the ends. Remember that quilting and binding can reduce the final size slightly, so include a small amount of seam allowance in your cutting plan.
Choose a Personalized Design
The most enjoyable part of this project is choosing details that make the runner unique. Start with a simple color scheme and add one or two personal features.
Consider these ideas:
– Use the recipient’s favorite colors.
– Match the runner to a room’s curtains, dishes, or wall art.
– Add fabric connected to a season, such as leaves for autumn or flowers for spring.
– Include a monogram or an initial.
– Use a repeating pattern made from squares, strips, or triangles.
– Add a border in a contrasting color.
– Incorporate fabric from meaningful clothing or household textiles.
If you are new to quilting, choose a design made from rectangles or squares. These shapes are easy to measure, cut, and sew together. A strip-pieced design is especially beginner-friendly because it creates a patterned surface without requiring many small pieces.
Gather Your Materials
For a basic quilted table runner, you will need:
– Quilting cotton for the top
– Cotton fabric for the backing
– Batting cut to match the runner
– Coordinating thread
– A rotary cutter, ruler, and cutting mat
– Fabric scissors
– Sewing machine
– Pins or fabric clips
– Iron and ironing board
– Hand-sewing needle
– Optional decorative fabric or embroidery thread
Prewash and dry your fabrics before cutting. This helps prevent unexpected shrinking after the runner is finished. Press each fabric flat so the pieces will be easier to measure accurately.
Calculate the Fabric Pieces
Create a simple sketch before cutting. Mark the finished width and length, then decide how many blocks or strips will fill the center.
For example, you might use:
– Six-inch squares arranged in rows
– Two-inch strips sewn together and cut into sections
– A large center panel surrounded by a border
– Alternating light and dark fabric blocks
Add a quarter-inch seam allowance to each edge that will be sewn. If you want a finished six-inch square, cut each square slightly larger to account for the seams.
Accurate cutting makes the sewing process much easier. Measure twice before cutting, and keep your pieces organized in labeled groups.
Sew the Quilt Top
Lay out all the pieces on a flat surface before sewing. This allows you to check the color balance and pattern placement. Take a quick photo with your phone so you can refer to the arrangement later.
Begin by sewing pieces into rows. Place two pieces together with their right sides facing, then sew along the edge using a quarter-inch seam allowance. Press the seam after each step. You can press seams open or press them toward one side, but use the same method throughout the project.
Next, join the rows together. Match the seams carefully, pinning or clipping them in place before sewing. Press the completed quilt top so it is smooth and flat.
If your design includes a border, sew the side borders first. Then attach the top and bottom borders. Measure the runner before cutting border pieces, since the actual size may differ slightly from the original plan.
Add Personal Details
A small custom detail can transform a simple runner into a keepsake. Add personalization before assembling the quilt layers whenever possible.
Monograms and Names
You can embroider an initial, name, or date on a fabric square or corner. Hand embroidery gives the runner a relaxed, handmade appearance, while machine embroidery creates clean, even lettering.
Practice on a scrap piece of fabric first. Keep the lettering simple and large enough to read after quilting.
Decorative Appliqué
Appliqué involves attaching a fabric shape to the quilt top. Try leaves, stars, hearts, flowers, or another shape that suits the occasion.
Cut the shape from fabric, turn under or finish the edges, and attach it with a narrow zigzag stitch or a hand-sewn blanket stitch. Place the appliqué away from the runner’s edge so it is less likely to be caught in the binding.
Meaningful Fabric
Small pieces from a favorite shirt, baby blanket, or old tablecloth can add sentimental value. Make sure the fabric is clean and strong enough for sewing. If it is lightweight or worn, stabilize it with fusible interfacing before adding it to the quilt top.
Assemble the Quilt Layers
A quilted runner has three layers:
- The completed quilt top
- A layer of batting
- The backing fabric
Cut the batting and backing a little larger than the quilt top. Place the backing face down, add the batting, and place the quilt top face up.
Smooth the layers from the center outward. Secure them with safety pins, quilting clips, or temporary spray adhesive made for fabric. Keep the layers flat to prevent wrinkles and shifting.
Quilt the Runner
Quilting holds the three layers together and adds texture. Choose a method that suits your skill level and design.
Straight-line quilting is one of the easiest options. Sew lines along the seams or create evenly spaced lines across the runner. You can also quilt a simple grid by sewing lines in both directions.
Other possibilities include:
– Diagonal lines
– Free-motion loops
– Echo lines around appliqué
– Stitching in the ditch along existing seams
Test your thread tension on a scrap quilt sandwich first. Sew slowly and avoid pulling the fabric through the machine. Let the machine feed the layers naturally.
After quilting, trim the edges so the runner has clean, even sides.
Finish with Binding
Binding covers the raw edges and gives the runner a polished finish. Cut fabric strips about two and a half inches wide. Join the strips end to end, then press the long strip in half lengthwise with the wrong sides together.
Sew the binding to the front of the runner, matching the raw edges. At the corners, fold the strip to create neat miters. Wrap the binding around to the back and sew it in place by hand or with a careful machine stitch.
Press the finished runner lightly. Check for loose threads, uneven edges, or missed stitches, and trim them before using the piece.
Care for Your Quilted Runner
Wash the runner gently in cool water with a mild detergent. Air-dry it flat or use a low-heat dryer setting. Avoid high heat, which can shrink the fabric or affect decorative details.
Store the runner folded or rolled in a dry place. If you want to keep it looking smooth, press it on the cotton setting with steam as needed.
With thoughtful fabric choices and a few personal touches, a quilted table runner can become both useful home decor and a lasting handmade keepsake.
Related Posts
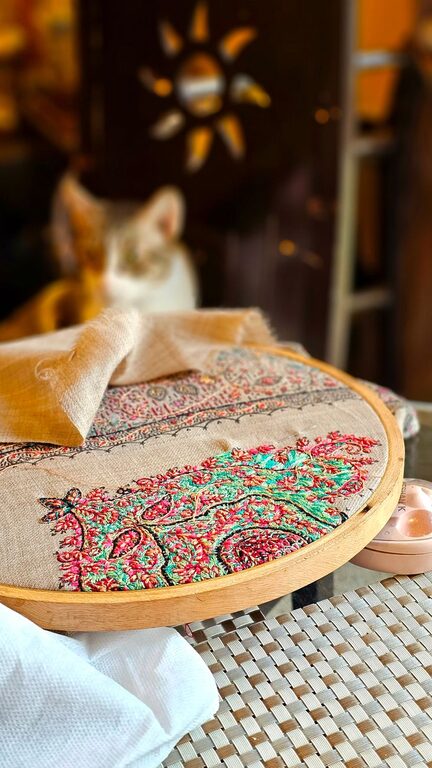
Learning Traditional Embroidery With Modern Hoop Designs
Traditional embroidery is a craft with a long history, but…